How To Install Computer Memory
If you have noticed that it takes a long time for your computer to boot up or if you a receiving message saying "windows is increasing your virtual memory" when you are trying to open applications on your computer then it is time for a RAM, or memory upgrade.
This is one of the cheapest and most beneficial upgrades that can be done on your computer. Once you find out what type of RAM you need it is a breeze to install. First we will discuss how to find out what type of RAM you need and where to get it from. There are a few things that you need to know first. Some computers require that RAM be installed in pairs, meaning that if you currently have 256MB of RAM then you have 2 banks and each bank has a 128MB stick of RAM installed. There is also a maximum amount of RAM that a computer can hold. Most newer computers can hold anywhere from 2GB to 4GB of RAM. There are a few sites that will tell you what type of RAM you need, if you need to install it in pairs and how much RAM your computer can hold. www.memory.com and www.crucial.com are the 2 top sites that do this. I will usually check both of these sites just to make sure that they both have the same info.You can pick either one to get started. I will walk you through going to memory.com. Once on their site you will want to go to "RAM Memory Upgrade" and then select "Memory Configurator" You will now need to select your computer model. and click select. You will see standard memory, this is more than likely what is already in your system. You will also see maximum memory as well as how many banks you have in your computer and the speed and type of RAM you will need. It would be best to write down the number at the end of the comments, it should start with DDR or SD. You can purchase RAM from memory.com, but I would recommend looking at www.newegg.com first since their prices are usually cheaper. Once on newegg.com you will want go to "memory" from the menu on the left. You will then need to select either desktop or laptop and from there you will be able to drill down with the info from memory.com. You will see many RAM manufactures, personally I would stick to either Kingston, PQI, or PNY. These are the ones that I find to be most reliable. It is still important to read the reviews though.
OK so now you are ready to install you new RAM. The first thing that you will need to do is to turn your computer off. You will need a phillips head and a flat head screwdriver.
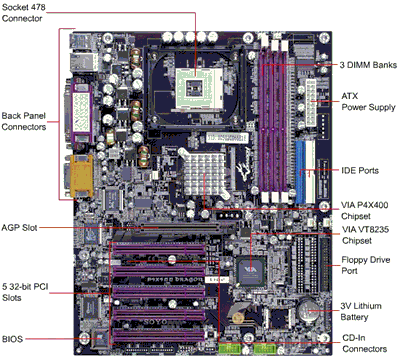
If you have a desktop you will need to remove the side cover, to do this you should see 2 phillips screws on the back side where the side panel meets the case. Unscrew the 2 screws and press the side panel toward the back of the computer. You will see the slots that contain RAM. They may be either purple or black and they will have a plastic clip on each side.

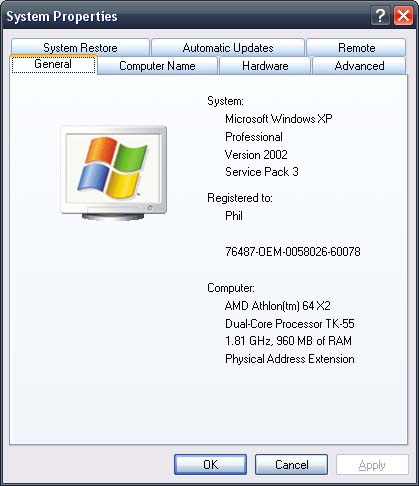
You will need to press on the white tabs first. If you need to remove any RAM just press on the white tabs and then lift the RAM straight out of the computer. To install your new RAM you need to make sure that both white tabs are open and then you will need to look at the orientation on your RAM. It will have a gap in it, one side is longer than the other. You need to make sure that this matches with the motherboard. RAM will only install one way. If only one side snaps in and the other end is sticking up then you need to flip it around. Once it is lined up correctly you will need to press straight down until you hear it click into place. Each clip should go back to its original position, sometimes you need to press the clip back into place. Now turn your computer on and make sure that it sees the new memory by right clicking on "My Computer" and going to properties. You will see how much RAM you have installed towards the bottom.

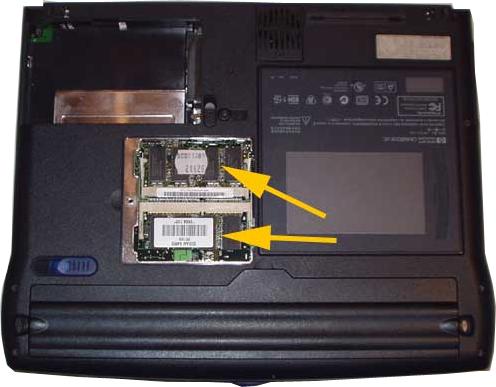
If you have a laptop, follow the above instructions as far as shutting down your computer. You will need to flip your laptop over and you will see a panel on the bottom with a "M" marked on it. Take the screws out and pop the panel out, there should be a grove in it to get your finger nail under.

You will see a metal tab on each side of the RAM, to remove the RAM you need to press each tab toward the outside of the laptop, the RAM will then pop up at an angle, you can now remove the RAM. Installation is about the same, you need to insert the RAM at an angle, the same rule applies as mentioned above, the RAM has a groove in it so you need to line it up before you will be able to install it. Once inserted at an angle you will need to press down until it snaps into place. Once done put your panel back on and boot into Windows to verify that it is showing up. You are all done.