Wireless Router Configuration Steps
This is a step by step tutorial of how to set up and configure your wireless router. I wrote this tutorial for a Linksys router because this brand is the most popular. There are a lot of other brands out there, but the set up and configurations are basically the same.
The first thing that you will need to do will be to hook up your new router. There should be a piece of paper that shows you how to plug everything in. If not you can follow the steps below:
- Plug in the power to your Linksys router
- Plug in the blue cable from the back of your cable or DSL modem into the Internet port on the back of your Linksys router.
- Plug in the blue cable that they give you in the box into the #1 port on the back of the Linksys router to the back of your computer. (If you are using a laptop you will need to have the cable plugged into the router for the initial setup, then you will be able to connect wirelessly)
OK, so now everything is hooked up and you are ready to set up your new router. Let's get started by opening a web browser and going to http://192.168.1.1
You will be prompted for a username and password. You should enter the following:
- username:blank
- password: admin
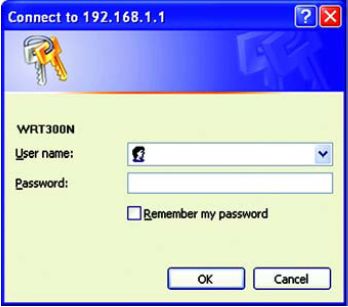
You will then see the following screen:
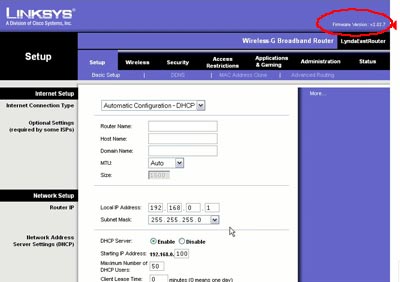
There are 2 sections that you need to be concerned with The Setup tab and the Wireless tab. Let's begin with the Setup tab, if you have a cable modem then you can skip to the Wireless tab section. If you have a DSL modem then you need to enter some information into the Setup tab.
DSL Setup Instructions
Under the Internet Connection Type you need to select PPPoE, you will then see a place to enter username and password. This will be your email address and your password. If you do not know this then you will need to call your Internet Service Provider to have them reset you DSL password. This is very important since you will not be able to connect to the Internet without this information.
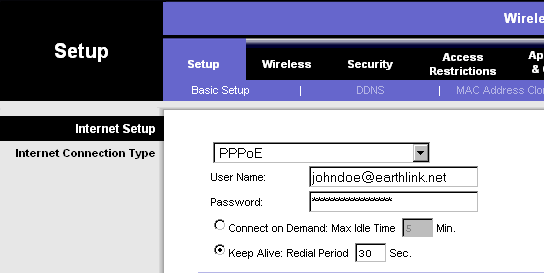
Select the button that says Keep alive redial period and enter 30 seconds. You will now need to press save settings at the bottom of the page.
Wireless Setup
Go into the Wireless tab. You will see the following screen:
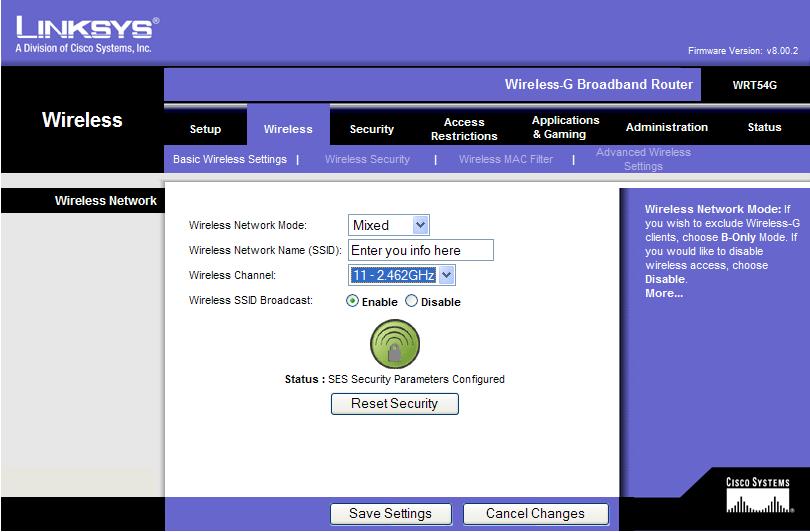
The wireless mode should say mixed. In the wireless name this is where you will need to enter a name that will identify your wireless network. for wireless channel you should select either channel 11 or channel 6.The SSID broadcast can stay set to enable. Click on Save Settings. You are now ready to go to the Wireless Security tab. You will see the following screen:
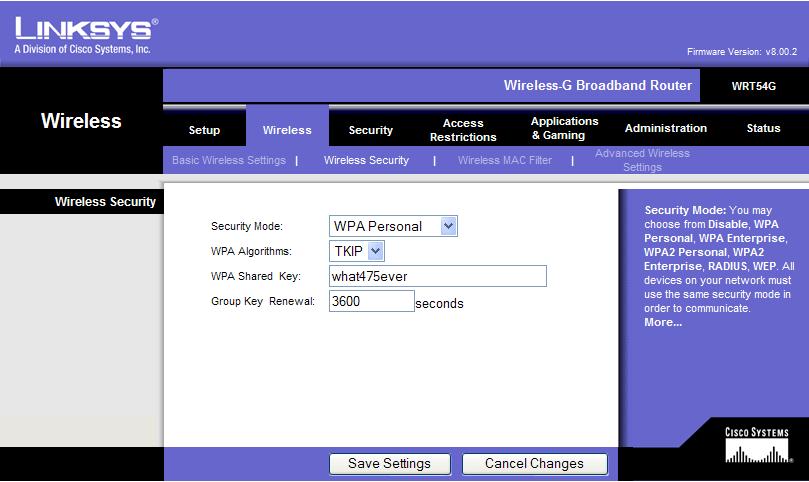
You will see different types of security under the security mode tab. The 2 most popular are WEP and WPA Personal. WPA is a stronger encryption, so I recommend selecting WPA Personal. For the WPA Algorithms you should select TKIP. the WPA Shared Key is the security code that will protect your wireless connection from being accessed by your neighbors. You will need this key to set up the wireless on any laptops in your home. This key should be at least 8 characters long and can be up to 32 characters containing both letters and numbers. Once you enter your key you can press save settings. Note: If your computer is more than a few years old then you will need to select WEP as your security mode. You can now close your web browser and go to a laptop that you would like to connect to your wireless.
You are now ready to connect your computer to your new wireless connection. The first thing that you need to do it to open your wireless network connection. This should be a small icon in the lower right hand corner of you screen with a red X over it. You need to double click on this icon and it will open a screen, you should see your wireless network listed.
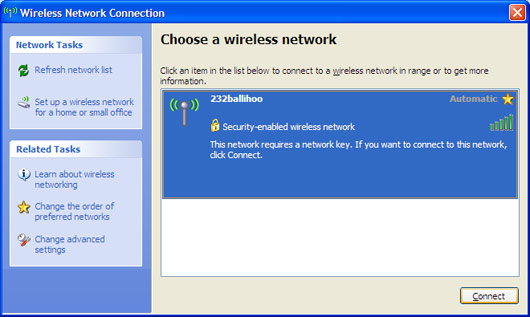
You can now click on the connect button, you should be prompted for the security code that you created previously. Enter your key and then press connect.
Congratulations! You have successfully set up and connected to your new wireless network.